Rain. What do you do when the weather isn’t ideal for hammock camping? I can’t tell you how many times I’ve had a camping or backpacking trip planned for weeks and the Monday before the big trip the forecast is calling for sunny skies and clear nights for the weekend. Then, as life often goes, Thursday comes around and the meteorologists start comparing the forecast to the last days of Atlantis. I’m talking 100% chance of rain. Being the stubborn man I am, I go anyway. I never cancel a camping trip because of the weather. To me, it’s all part of the experience. You just have to be prepared. The first few times I got caught in the rain with my hammock was terrible. I was soaking wet and miserable. I learned some invaluable lessons from those experiences. I thought it would be nice to share some of the tips and tricks I learned about hammock camping in the rain. I didn’t have this courtesy and I didn’t have any guidance so I hope this helps someone.
1. Get the right tarp
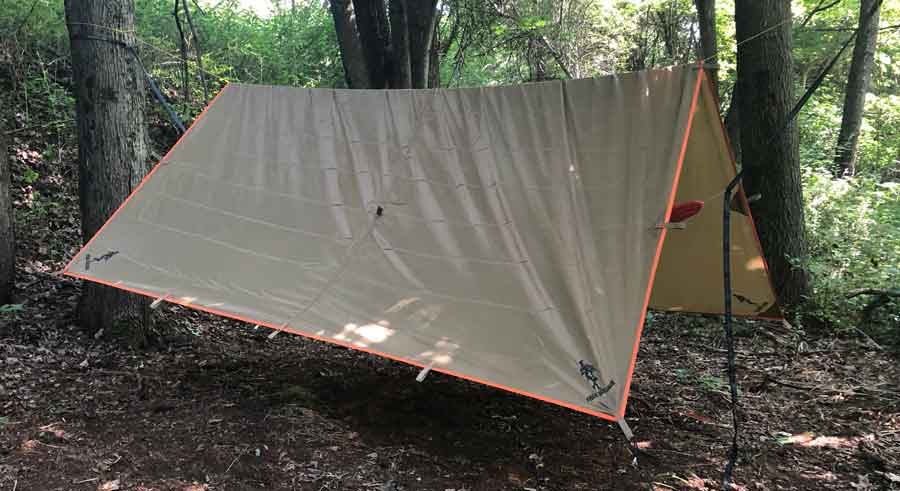
This is important, but I’m not going to tell you that you need to buy this size, style, and brand of tarp. What I mean about getting the right tarp is that you need to select one that works best for you. There are tons of options when it comes to rain flys and tarps. I have found that it’s good practice to always have a tarp that is about two feet longer than your hammock. The last thing you need is your hammock hanging out both ends of your tarp when it’s raining. It defeats the entire purpose and you will get wet.
2. Check your tarp
This goes back to always checking your gear before your trip. I learned a couple of hard lessons about checking my gear early on. I now have a checklist and make it a priority to get my gear out a day or two before my trip and check everything over thoroughly. Don’t forget to check your tarp. Flaws in your tarp can be easy to miss. Even the smallest hole can cause big problems if it rains. Don’t get caught in the rain only to find your tarp has a tear or hole in it.
3. Know how to set up a ridgeline quickly
Knowing your knots is going to help you a lot with setting up and taking down your hammock quickly. When I first got started hammock camping, I didn’t know my knots very well. I knew a few of the basic ones, but looking back, I wish I knew more and practiced tying them regularly. It could have saved me a lot of time. Time is of the essence when you get caught in a downpour. Practicing setting up your ridgeline will make you fast and efficient. I advise anyone getting into hammock camping to practice setting up and taking down your hammock in good weather conditions. This way you will be well-prepared in the case of any pop-up rainstorms.
A Useful Bonus Tip: I always keep one end tied off. I keep the loop end of my ridgeline pre-knotted in the case that I need to do a fast set up in the rain. Again, I suggest practicing this and timing yourself.
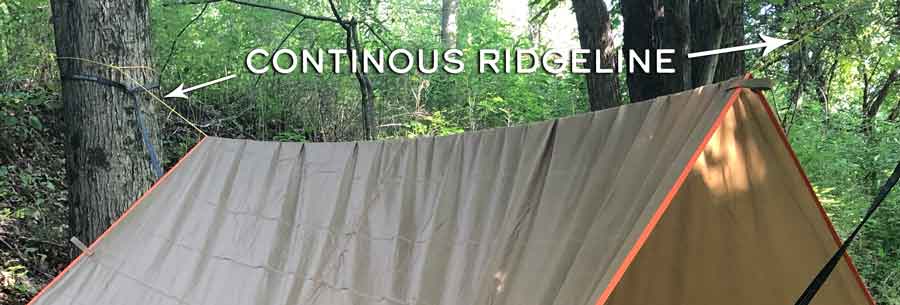
4. Continuous Ridge Line above your Tarp.
Be sure to set your Continuous Ridge Line (CRL) above or outside of the tarp and not under it. I typically use a CRL under my tarp, but not if there is rain in the forecast. This is a common mistake and I’m not afraid to admit that I made this mistake once. If the CRL is under the tarp when it rains, you will be allowing rain to come right on in and drip from your ridgeline all over you. Similarly, you add drip-lines to your straps to keep the rain flowing onto the ground and not into your hammock. It’s crucial to understand how water flows when you are planning to hammock camp in the rain.
5. Split Ridgeline
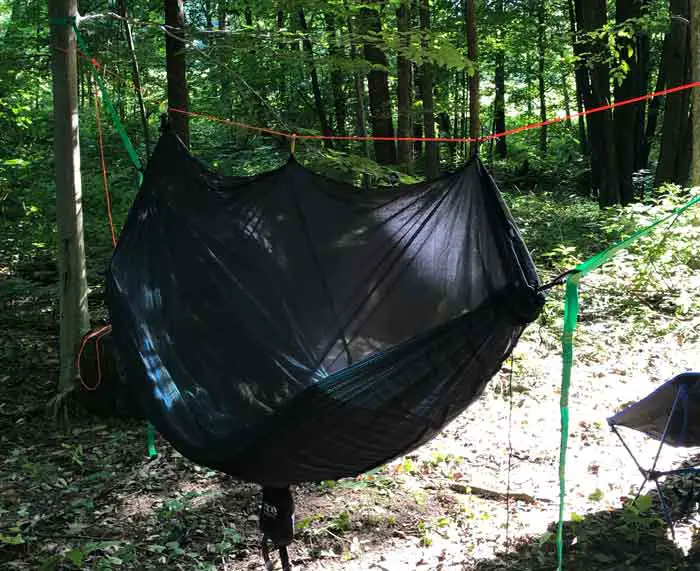
If you decide not to have a CRL, (Continuous Ridge Line) then the best bet is to split your ridgeline. Instead of having one line from tree to tree, you will tie a short string to the tree and then to your tarp. Then just repeat the same on the other side. Using a CRL has its benefits since you can just slide around to get your hammock in the middle. Splitting your ridgeline isn’t difficult, but can sometimes take a little more adjusting. Having a split ridgeline with the set-up being outside of the rainfly will be a safer bet since it won’t allow the water to flow into the hammock.
6. Know the direction of the wind
Know the direction of the wind and rain when setting up your campsite. Avoid setting up your tarp parallel to the direction of the wind and rain. Doing so will create a wind tunnel that the rain will blow right into. Always look for trees that will create a more perpendicular hammock set-up in relation to the direction of the wind. This way the rain will blow right up and over your tarp.
7. Find a safe spot!
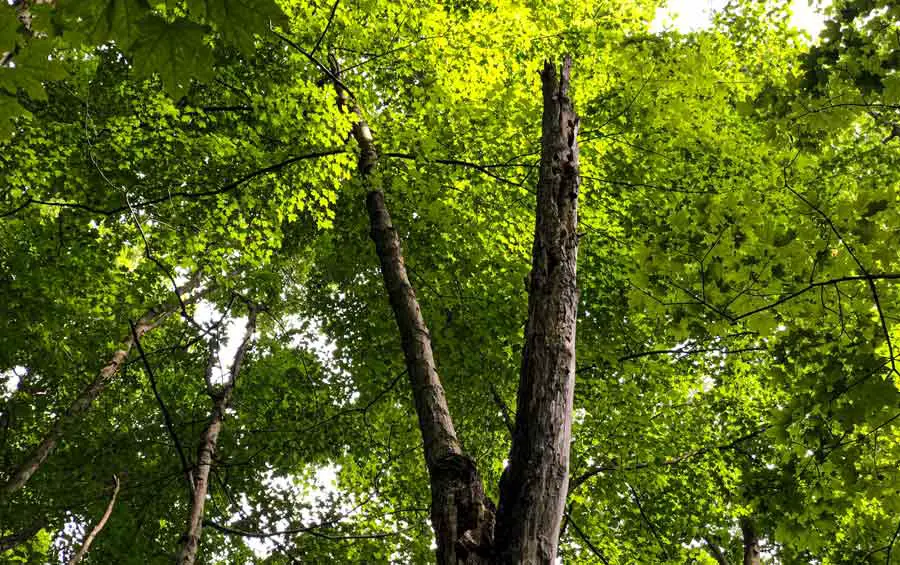
Don’t rush! It can be tempting when there is a sudden downpour to find any tree to hang from. Don’t sacrifice safety for getting a little wet. It’s not worth your life. Always be sure to do your due diligence and look up into the trees to look for large dead branches known as widowmakers. You must also look at the tree health to determine if they are safe for you to set-up on. I go in more depth about this when I talk about finding the right trees in another post. I know it might be raining and being wet can be miserable, but don’t rush this part and overlook safety concerns. Your safety should always be your first priority.
8. Become Efficient at Picking Out Campsites and Trees
When it is pouring down rain the last thing you want to do is keep walking around trying to find the right spot and the right trees. I know I just said you don’t want to rush the process of finding a safe spot. Finding a safe spot at the right angle is very important. You should focus on that first for sure. The basic tree selection needs to become second nature to you. Figure out a way to pick your trees fast and getting the proper spacing. When it comes to finding your distance, you can always stand between two trees and hold out your trek poles to use as a rough measurement. You can measure that distance before you go on your camp to get a rough idea of the distance between trees and that will help to speed up your selection process.
9. Keep water from pooling
Select a spot that will allow you to fully extend your tarp. Make sure there aren’t any bunched up areas or corners of the tarp that can hold and collect water. If the water pools too much it can create extra weight on the tarp causing it to shift or pull to one side. Obviously if your tarp placement shifts, your hammock is not going to be protected and it will get wet.
If you set up a porch with the tarp, you want to set your trek poles at different heights so the tarp is angled and you don’t get pooling on the top. Keeping the water flowing onto the ground is vitally important in order to keep you and your gear as dry as possible. Pooling water is just asking for trouble.
10. Pack your Tarp so that it is Easily Accessible
Again, maybe this is common sense, but it’s something that is overlooked quite a bit. When you are putting all your gear in your pack, you want to be sure to leave your tarp where you can have quick access to it. You never know when it is going to rain and buying yourself any little bit of time is worth it. I keep my tarp at the top of my pack so I can grab it easily and set up my tarp quickly if I need to. If you have to dig to the bottom of your pack to get to your tarp, you risk all of your gear getting wet. No good.
11. Set Your Tarp Up First
Set up your tarp first if you find yourself having to hammock camp in the rain. I usually always set up my hammock first, but that’s not the case when it’s raining. I quickly learned that using the cover of my tarp to shield me while I set up my hammock was the way to go. Once the tarp is up, you can take your time setting everything else up. Just don’t do it the other way around. Everything, including you, will be soaked and it’s no fun to camp like that.
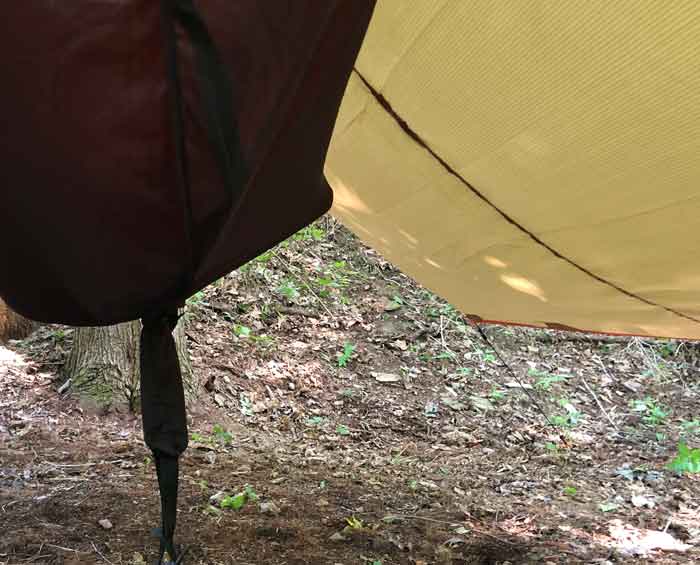
12. Use Drip-Lines
A drip-line is a string or anything that hangs from your ridgeline and straps to allow the water to flow directly and easily onto the ground. If you use drip-lines, you will significantly increase the likelihood that water will flow down your straps and ridgeline down into your hammock. You will get wet. Be sure that the drip-lines are under your tarp and not on the outside or it won’t work. Drip-lines are so easy to implement. Don’t leave them out.
13. Get Close and Personal with your Tarp
Set your hammock higher up than usual. Getting close to the tarp may be a little awkward, but it will protect you better from blowing and splashing rain. Remember to keep in mind that you can get splashed from the water hitting the ground beneath you as well. Hanging higher up will keep your underside dry. If you have a really large tarp that covers every opening well, then you can disregard this tip altogether.
14. Twist your hammock straps
I learned this from a friend. It’s a handy and easy tip. Essentially twist your straps a few times in order to break up the flow of water going down your straps so it drips off onto the ground rather than making its way into your hammock.
15. Zip-tie your straps
I also learned this tip from a friend. In addition to twisting the straps, take a zip-tie and cinch it down really good on the strap under your tarp. Along with the drip-line, this provides another way for the water to run down to the ground instead of into your hammock. The purpose of the zip-tie is to squeeze the strap fibers tightly so as to keep the water flowing down and preventing it from soaking into the straps.
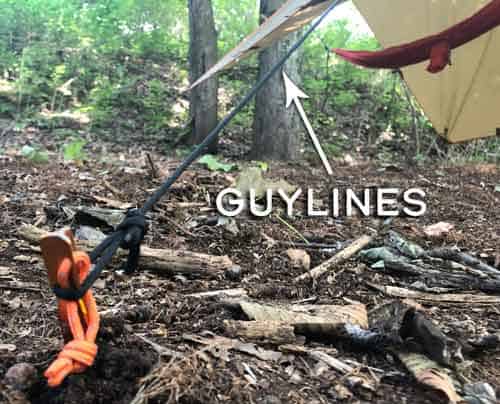
16. Leave the guy-lines on your tarp
The key to setting up in the rain is to get your tarp set quickly. Any little time savers help. A hack I learned is to keep my guy-lines attached to my tarp at all times. So when I pull the tarp out and hang it, all I have to do is connect it to my stakes. There’s no wasted time having to tie your guy-lines to the tarp. It’s already done.
17. If Something Is Wrong, Fix It.
If you find you are getting wet, even a little bit, fix it immediately, even if you have to get up in the middle of the night to do it. If you don’t fix small problems as they arise, you will end up in a bad situation. It is far better to get a little wet fixing something than getting completely soaked.
18. Tear Down Backward
During tear down, do the opposite of how I suggested set-up. Take care of getting your hammock and all your gear packed up under the tarp. This way, everything will stay dry inside your pack. Since your tarp will still be wet, you will carry it on the outside of your pack so if you are hiking and need to set up again everything will be dry by the time you get to your next campsite.
19. Practice, Practice, Practice!!!
Seriously, if you want to be prepared, then you have to practice. I’m not saying if it’s raining outside to run out and immediately set-up. I suggest practicing on nice days and setting up weekly goals to meet. A good goal is to set your hammock up around three times in a given week and time yourself. Each time you set up you will get faster. This will pay off big when you need it. You’ll be all set up and dry while everyone else is scrambling to get their tents set up in the pouring rain.
Being Prepared = Staying Dry
I’m sure these tips will help you the next time you start seeing dark clouds rolling in. Everyone who hammock camps will eventually experience hanging in the rain. If you’re prepared and know how to handle the situation, it’s no big deal.
I wish you luck and hope you stay dry while out in The Wanderful Wild.